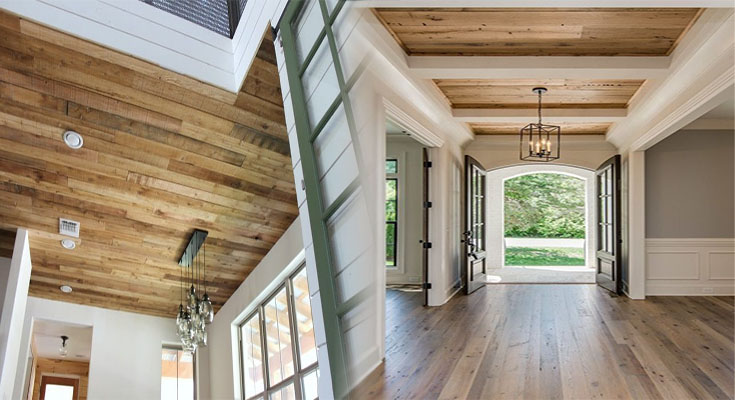
When it comes to farmhouse décor, a rustic wooden ceiling can add warmth, character, and a touch of charm to any space. Installing wooden ceiling planks can be a rewarding and visually appealing DIY project that transforms the look of your home. Here’s a step-by-step guide to help you install rustic wooden ceiling planks for your farmhouse-inspired interior:
Step 1: Plan and Prepare
Before you begin, carefully plan out your project and gather the necessary materials. Measure the square footage of your ceiling to determine how many planks you will need. Consider factors such as the direction of the planks, the spacing between them, and any unique design features you want to incorporate.
Step 2: Choose the Right Planks
Selecting the right wooden planks is crucial for achieving an authentic rustic look. Opt for reclaimed or distressed wood that showcases natural imperfections and textures. This will add character and lend an authentic farmhouse feel to your space. Make sure the planks are appropriately treated for indoor use and have been properly dried to prevent warping or shrinking.
Step 3: Acclimate the Wood
Once you have your planks, let them acclimate to the room’s temperature and humidity for at least 48 hours. This will allow the wood to adjust to the environment and minimize the chances of it expanding or contracting after installation.
Step 4: Prepare the Ceiling
Before installing the wooden planks, ensure that your ceiling is clean, dry, and free of any loose or damaged materials. Remove any existing ceiling fixtures or trim that may interfere with the installation process.
Step 5: Install Furring Strips
To support the wooden planks, install furring strips perpendicular to the ceiling joists. These strips will create a solid base for nailing or screwing the planks in place. Use a stud finder to locate the ceiling joists and mark their locations on the furring strips.
Step 6: Measure and Cut the Planks
Measure the length of the ceiling and cut the wooden planks accordingly, leaving a small gap on each end to allow for natural expansion. Use a miter saw or a circular saw with a fine-toothed blade to ensure clean and precise cuts.
Step 7: Install the Planks
Begin installing the planks by attaching the first row along one side of the ceiling, using either nails or screws. Make sure the first row is level and secure. Use a pneumatic nail gun or a drill to fasten the planks to the furring strips, ensuring they are snugly in place.
Step 8: Continue Installation
Subsequent rows of wooden planks should be installed by staggering the joints for a more visually appealing look. Apply construction adhesive to the back of each plank for added stability and durability. Use a combination of nails or screws and adhesive to secure the planks in place.
Step 9: Finishing Touches
Once all the planks are installed, inspect the ceiling for any gaps or irregularities. Fill in any nail holes or gaps with wood filler and sand the surface smooth. Apply stain or a protective finish to enhance the wood’s natural beauty and provide long-lasting protection.
Step 10: Enjoy Your Rustic Farmhouse Ceiling
With the installation completed, step back and admire your newly transformed space. The rustic wooden ceiling planks add warmth, character, and a touch of farmhouse charm to your home. Pair them with wooden beams, vintage lighting fixtures, and other farmhouse-inspired décor elements to create a cohesive and inviting atmosphere.
The installation of rustic wooden ceiling planks can be a transformative project for achieving a farmhouse-inspired interior. By following these step-by-step guidelines, you can create a beautiful and authentic rustic wooden ceiling that adds warmth and character to your home. Embrace the natural beauty of wooden planks, and enjoy the cozy and inviting ambiance they bring to your farmhouse décor.


